Virtual Machine Manager deployment
To deploy an LiveWire Virtual instance using the Virtual Machine Manager:
1. Download the LivePCA_Virtual_KVM_*.tar.gz package from LiveAction to the desired KVM host machine.
2. Determine the image store location. The recommended location for RedHat and Ubuntu is /var/lib/libvirt/images. In this guide, the following path is used:
/var/lib/libvirt/images/livepca.
/var/lib/libvirt/images/livepca.
sudo mkdir -p /var/lib/libvirt/images/livepca
3. Extract the two raw disk images from LivePCA_Virtual_KVM_*.tar.gz and archive to your desired image store location.
sudo tar xvzf LivePCA_Virtual_KVM_*.tar.gz -C /var/lib/libvirt/images/livepca
4. To open Virtual Machine Manager, click .
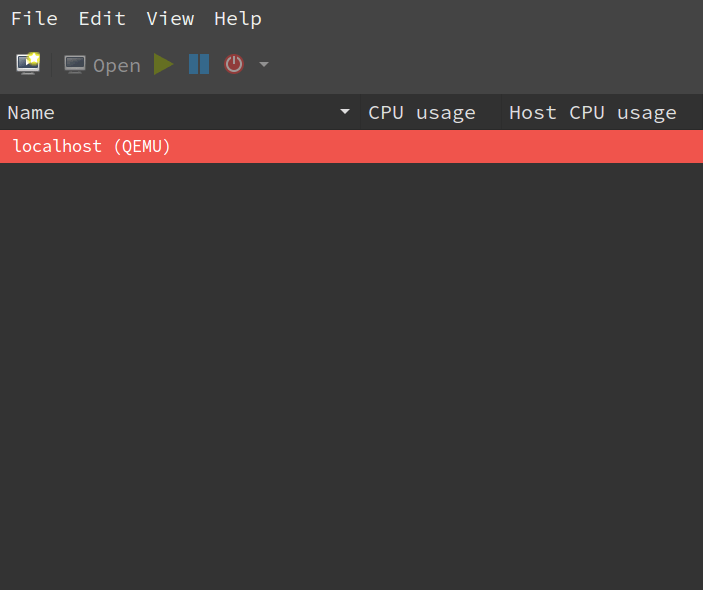
5. On the menu, click to launch the New VM wizard.
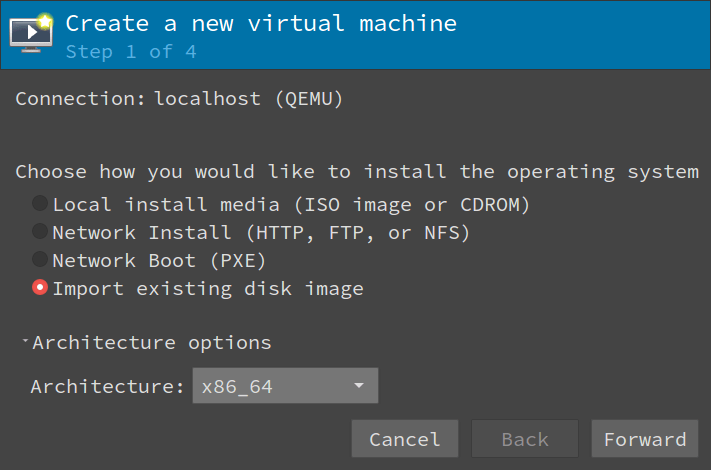
6. Choose how to install the operating system and architecture options, and then click :
• Select Import existing disk image
• Architecture: Select x86_64
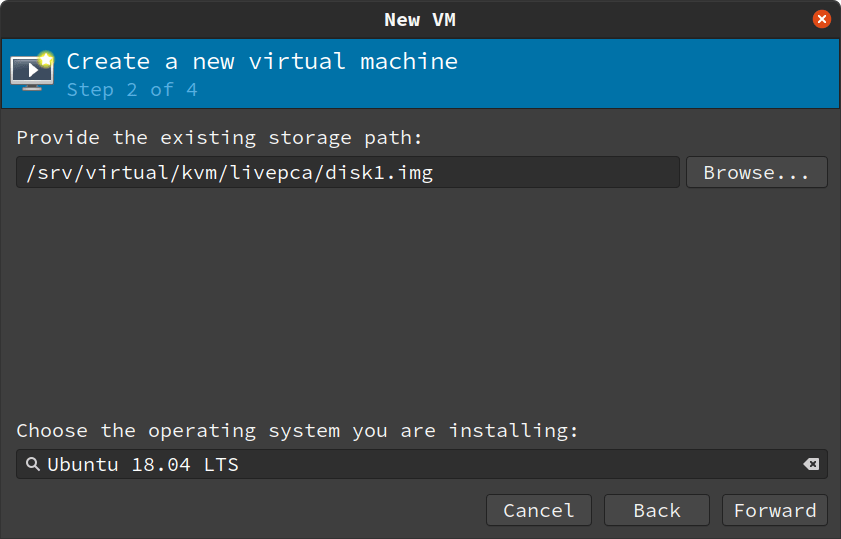
7. Provide storage and OS details, and then click :
• Provide the existing storage path: Browse to the disk1.img file extracted above (for example, /var/lib/libvirt/images/omni-virtual/disk1.img)
• OS type: Select Linux
• Version: Select Ubuntu 18.04 LTS
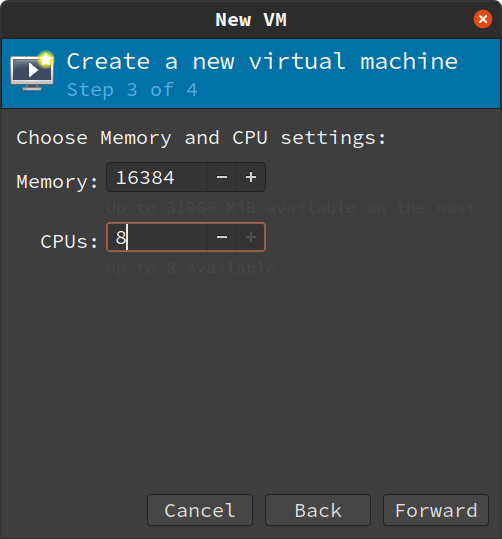
8. Choose Memory and CPU settings, and then click :
• Memory (RAM): Select 16384 MiB
• CPUs: Select 8
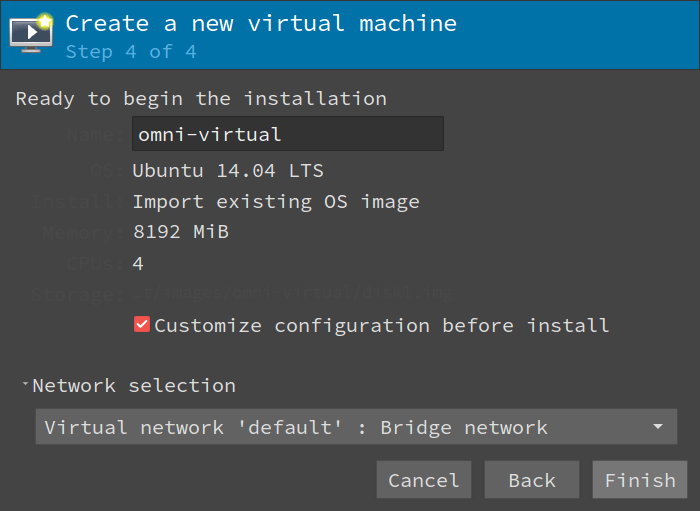
9. Assign a name to the VM, select the network selection, and then click :
• Name: Type a name for the virtual machine
• Customize configuration before install: Select this check box.
IMPORTANT: Make sure to select the Customize configuration before install check box.
• Network selection: Select Bridge network so that the management port can have its own assigned IP address.
10. From the side menu, select :
• Firmware: Select BIOS.
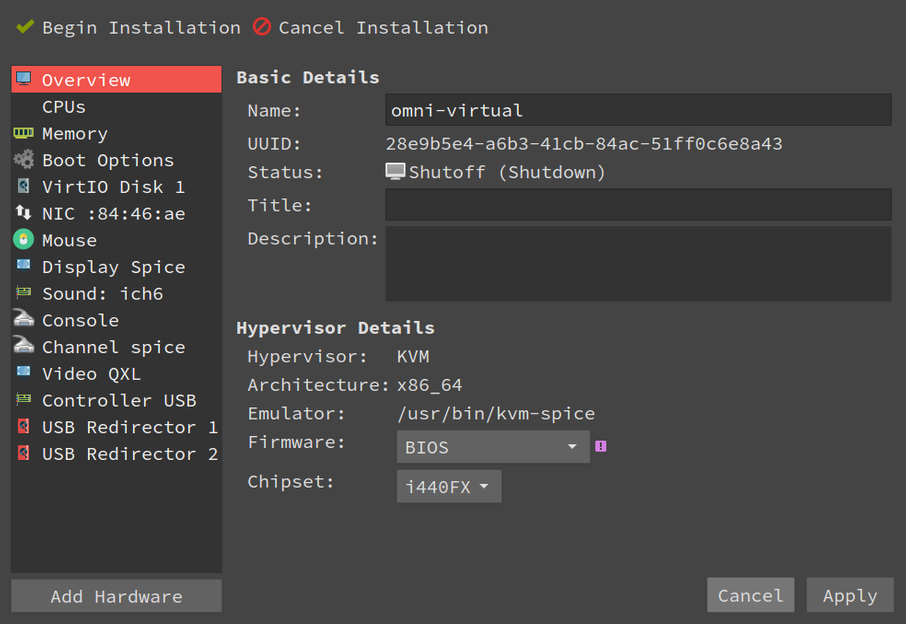
11. Click to save the changes.
12. From the side menu, select :
• Select Copy host CPU configuration.
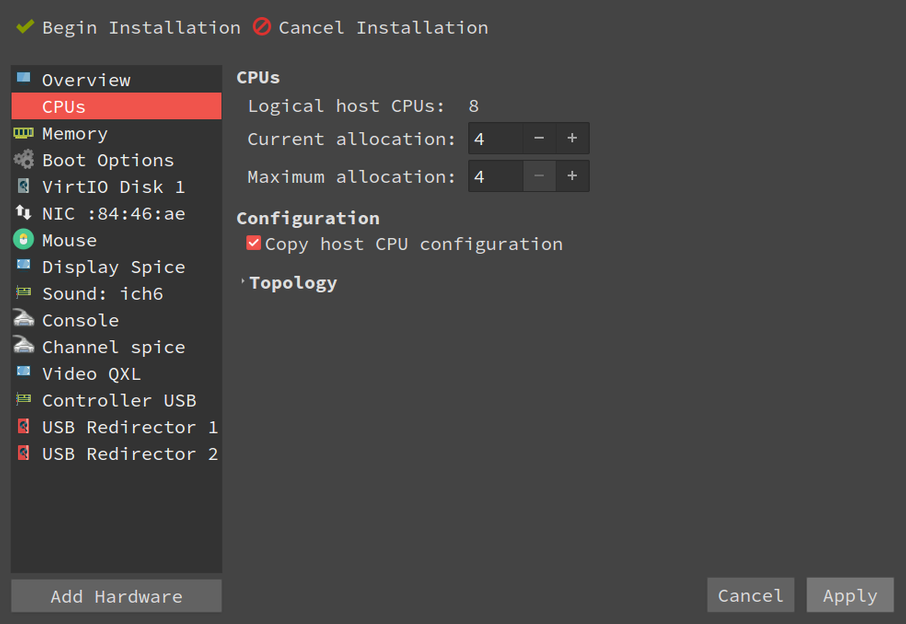
13. Click to save the changes.
14. From the side menu, select :
• Disk bus: Select VirtIO.
• Cache mode: Select none.
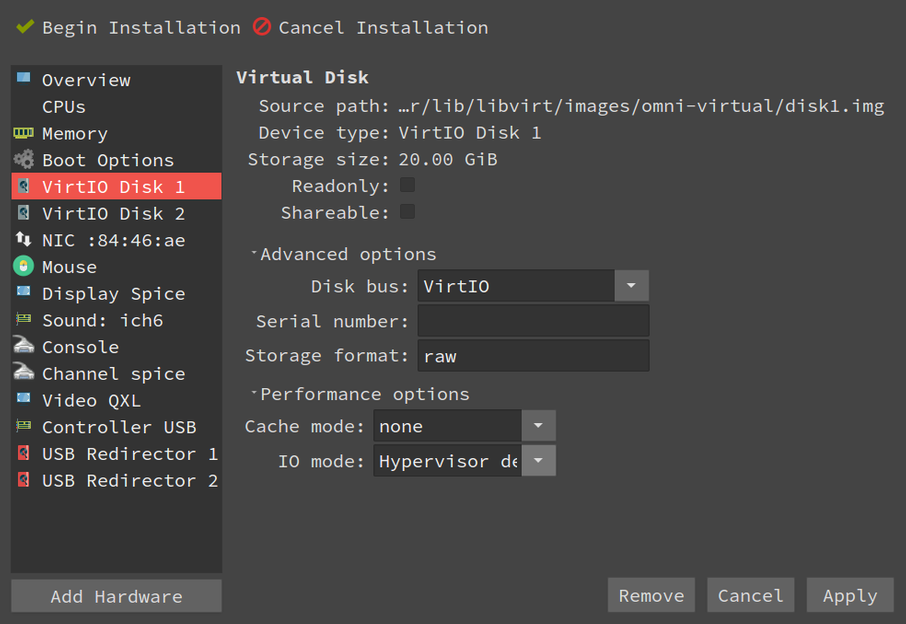
15. Click to save the changes.
16. From the side menu, select and then select Storage in the menu.
• Select Select or create custom storage and click to browse to the path of the disk2.img file extracted above (for example, /var/lib/libvirt/images/omni-virtual/disk2.img)
• Device type: Select Disk device.
• Bus type: Select VirtIO.
• Advanced options: Select none for cache mode.
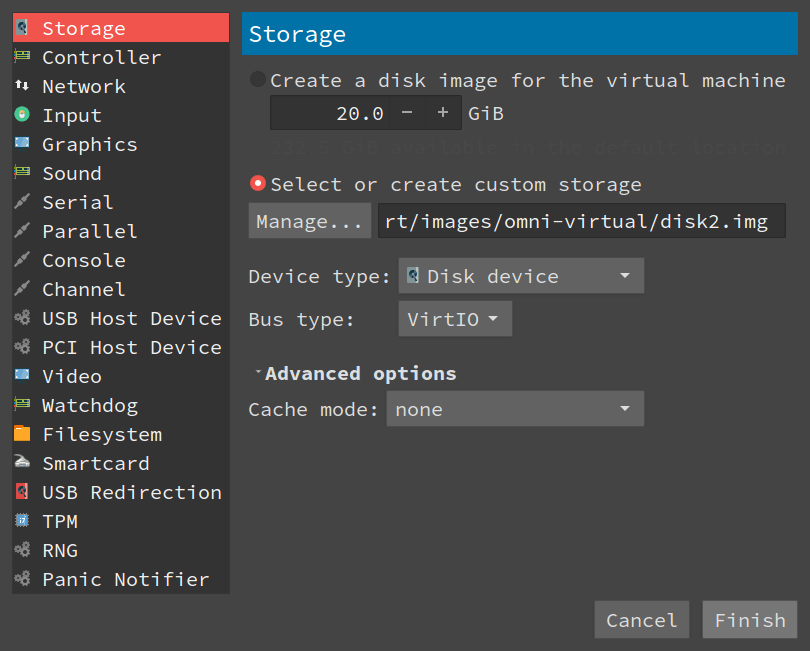
17. Click .
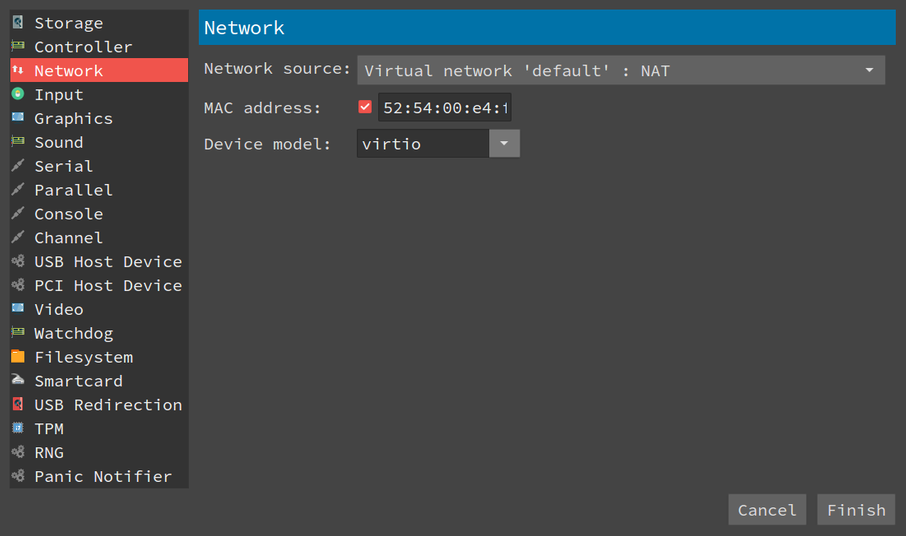
18. From the side menu, select :
• Network source: Select your management port network source.
• Device model: Select VirtIO.
19. Click to save the changes.
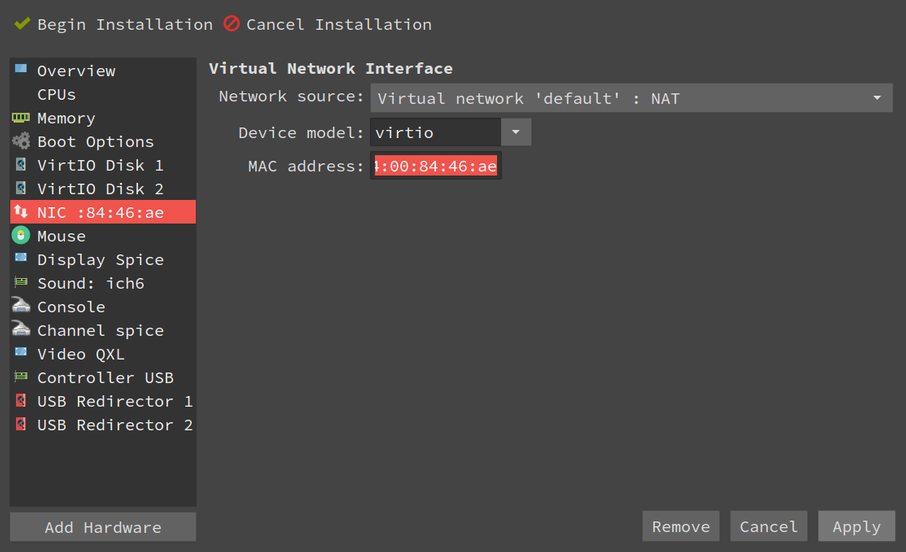
20. From the side menu, select and then select Network in the menu.
• Network source: Select the primary network source from where you are capturing traffic.
• Device model: Select VirtIO.
21. Click to add the new capture interface.
22. Click (upper left).

Virtual Machine Manager configures and automatically boots the LiveWire Virtual machine.
23. Log in from the console using the default credentials (admin/admin).
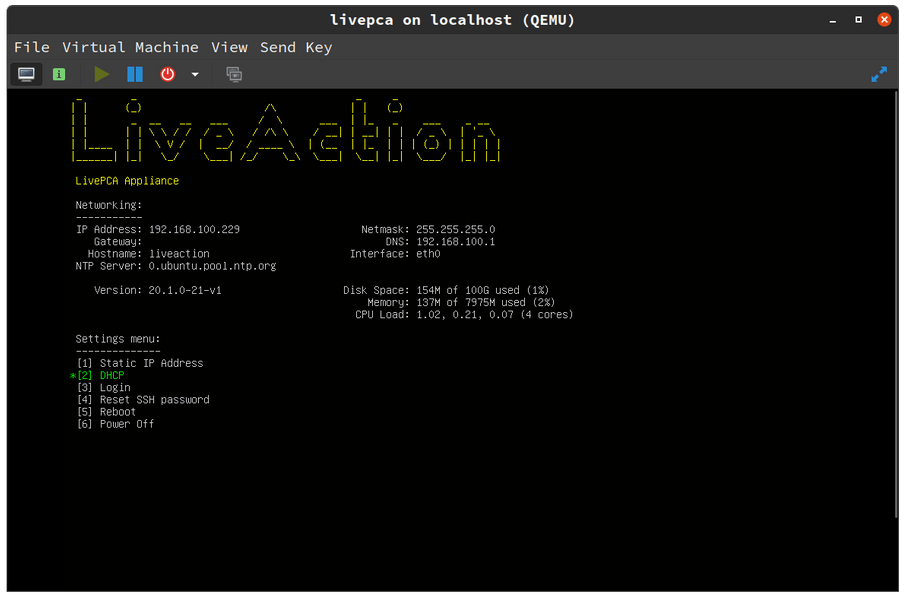
24. Use the following command to determine the management port’s IP address:
ifconfig eth0
25. You can proceed to configuring Ethernet and NTP server settings for the LiveWire Virtual machine. See Configuring Ethernet settings by command script on page 30 and Configuring an NTP server on page 31.
26. You can begin using LiveWire Virtual as a virtual appliance.